Every woman feels unstoppable when she has a great hair day and wants to hide from the world when she doesn’t. It’s disheartening to go to a special event or on a date and not feel like a princess.
All too often, a bad hair day can happen because it is incredibly expensive to have your hair professionally styled at a salon. Many up-dos look intimidating and complicated, and they might seem impossible to achieve on your own or even with a friend. What if you could create those hairstyles and never pay salon prices again?
This pictorial is here to save the day!
Hairstyling doesn’t have to be hard. With a photo and detailed description of every single step, even a novice can look like a pro. This hairstyle doesn’t require any special skills or tools. You just need to know how to braid and scrounge up a few items you probably already have in your beauty cabinet.
Follow this step-by-step boho braid tutorial for prom, your wedding, a friend’s wedding, graduation, or just a fun date night out. This easy-to-follow guide makes it simple to fool your friends into thinking your hair has been professionally styled! Only you will know that you created this look at home in less than fifteen minutes.
Here’s what you’ll need
- A brush
- Three hair ties
- About 10 bobby pins
- Hairspray
Optional
- Texturizing spray
- Curling iron
- Decorative hair pins
- Glitter hair spray
- Rat tail comb
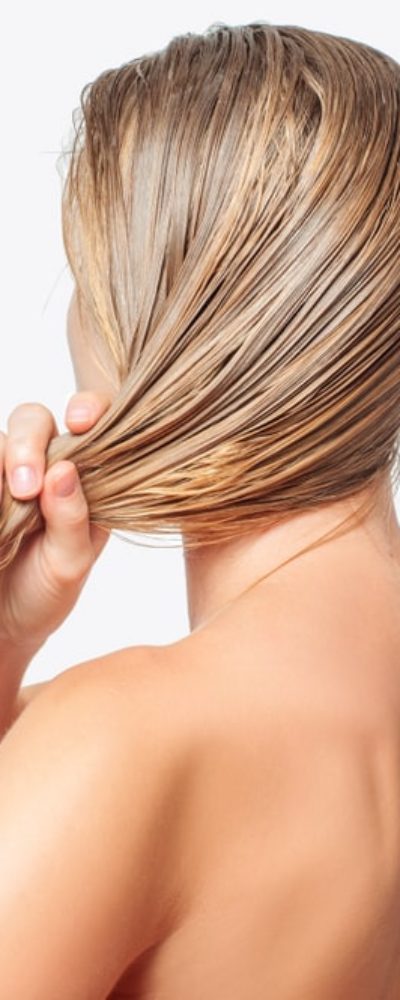
Step One: Prep Your Hair
It is essential to start with clean, tangle-free hair. Make sure your hair has been washed, blow dried, and brushed thoroughly before you begin. Damp hair will ruin this look. If you wish, you may add a texturizing spray or create waves with an iron before you begin, but these steps are not necessary to achieve the final look.
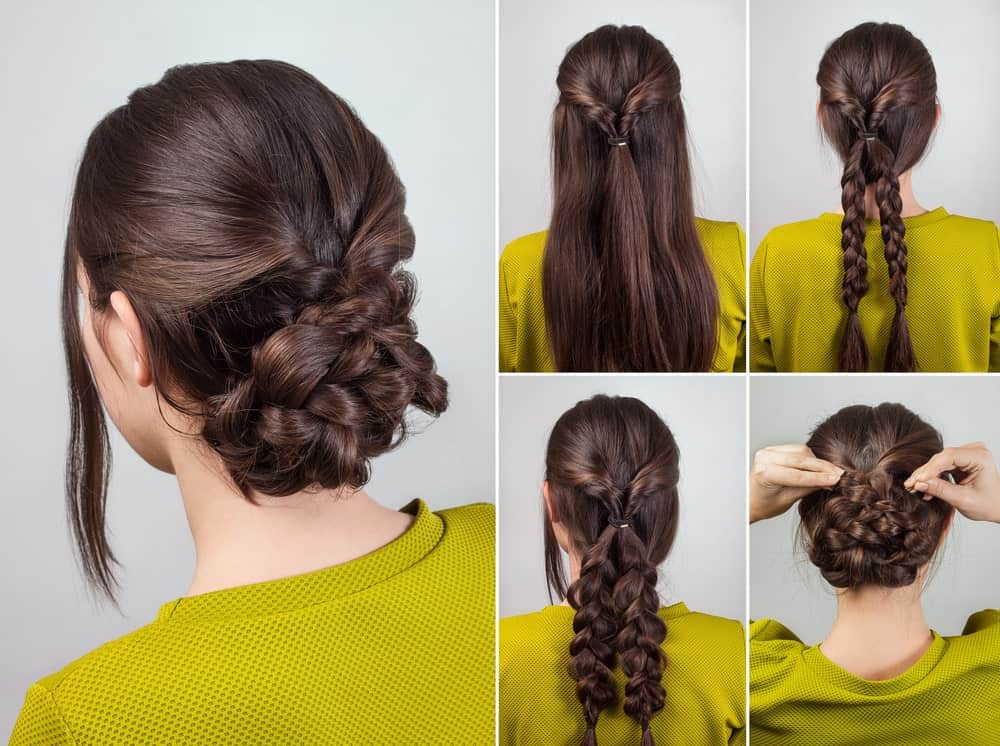
Step Two: Create an Inverted Ponytail
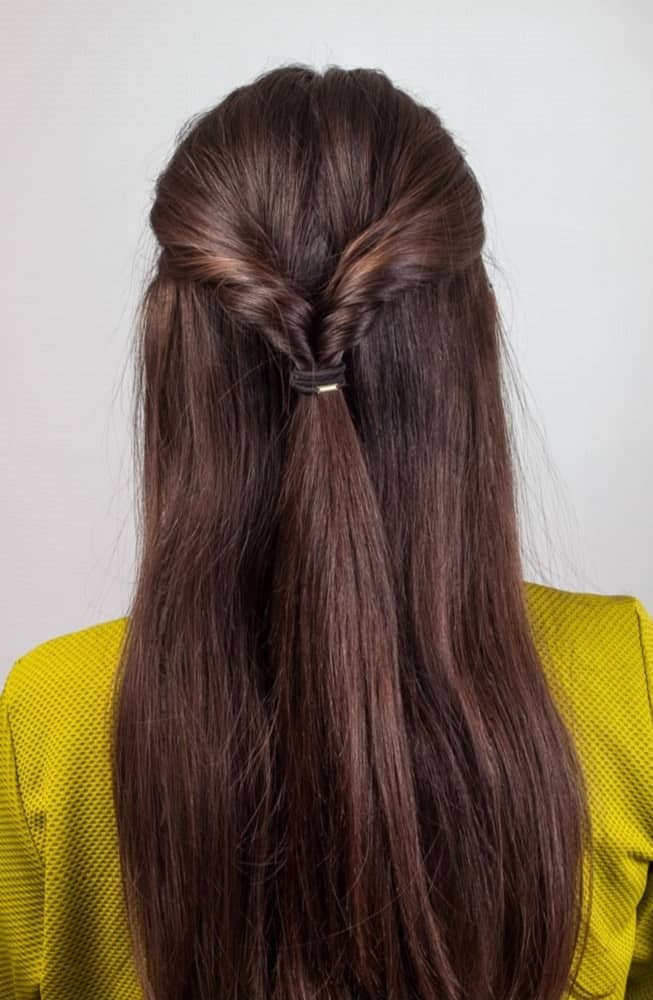
Starting just above the ear on either side of the head, create a horizontal part. It doesn’t need to be absolutely perfect, but it does help if it is mostly even. Brush through the upper section to smooth it out. Sweep up the upper portion of hair into a loose ponytail, and secure it using one of your hair ties. Just above the ponytail, create a hole in the center with your thumbs and index fingers. Thread the ponytail through towards the head, and pull it taut.
Step Three: Create Two Separate Braids
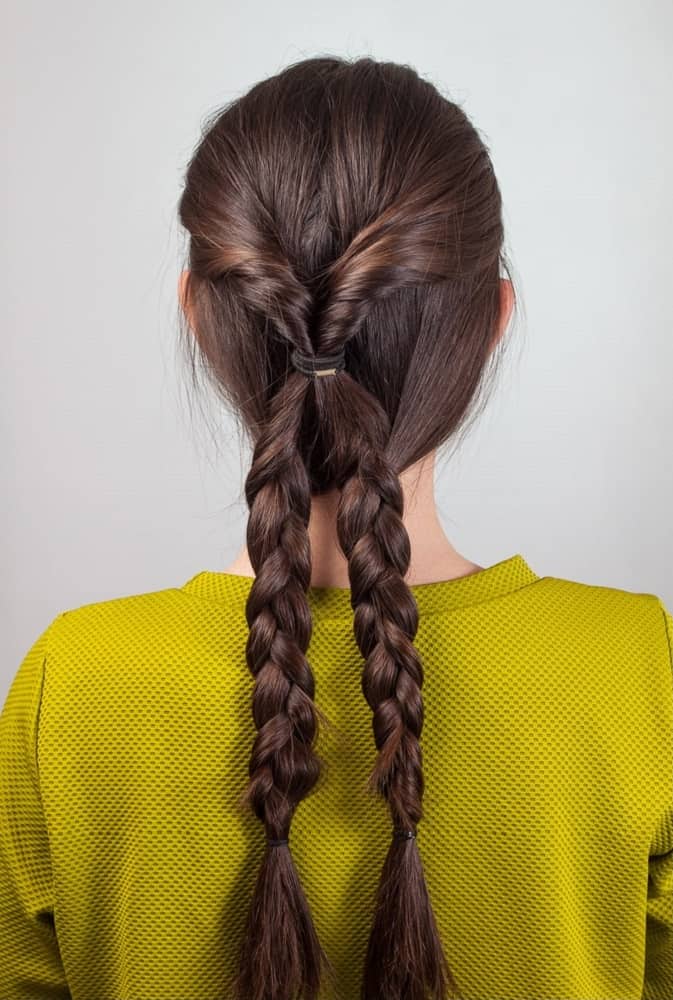
Next, separate the ponytail you created and the remaining lower portion of hair into two even sections. Using a hair tie, secure one section, and set it aside. Beginning at the ponytail, braid the hair traditionally, sweeping up the lower portion of the hair, and incorporating it into the braid as you would for a regular braid.
Secure it with a hair tie at the bottom of the braid. Remember to keep the braids towards the center of the head near the ponytail rather than towards the ear. Untie the remaining section of hair, and brush through it to ensure that it is smooth and tangle-free. Repeat the braiding step with the remaining section of the hair. Secure the second braid with a hair tie.
Step Four: Loosen the Braids
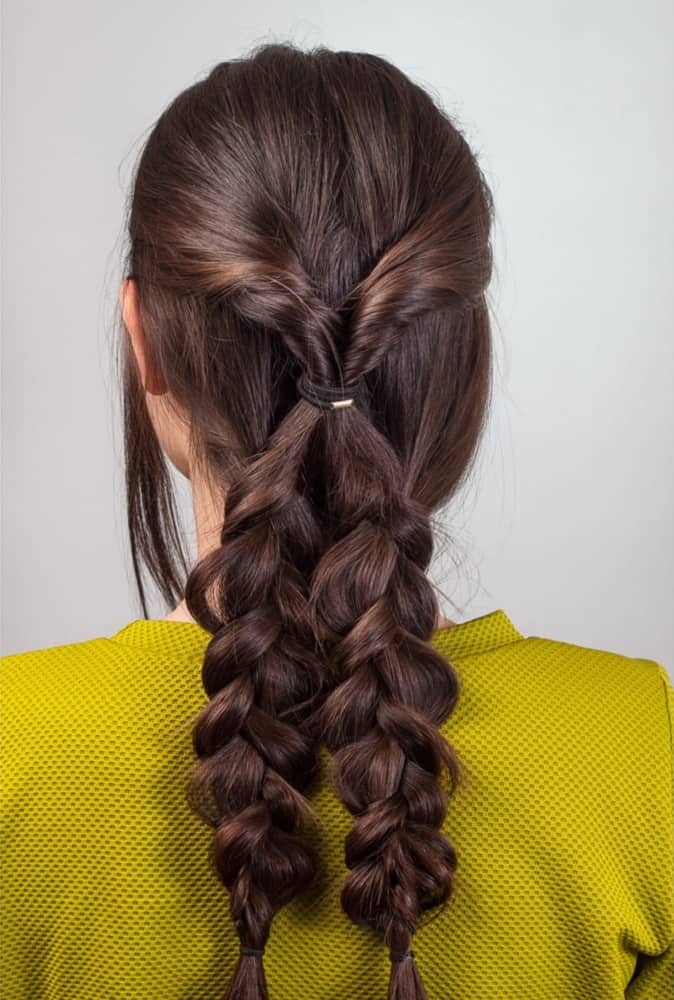
Very carefully, using your thumb and index finger, gently pull at each individual section of the braids until they are loose and more voluminous. Start at the top and work your way down each braid. Be patient with this part of the process or you will have to start all over again.
This step does not have to be perfect, but the hairstyle will look more professional if you take the time to make sure each part of the braid is pulled out evenly. When you have completed this step, you may spray the braids with hairspray for extra hold if you wish.
Step Five: Create a Braided Bun
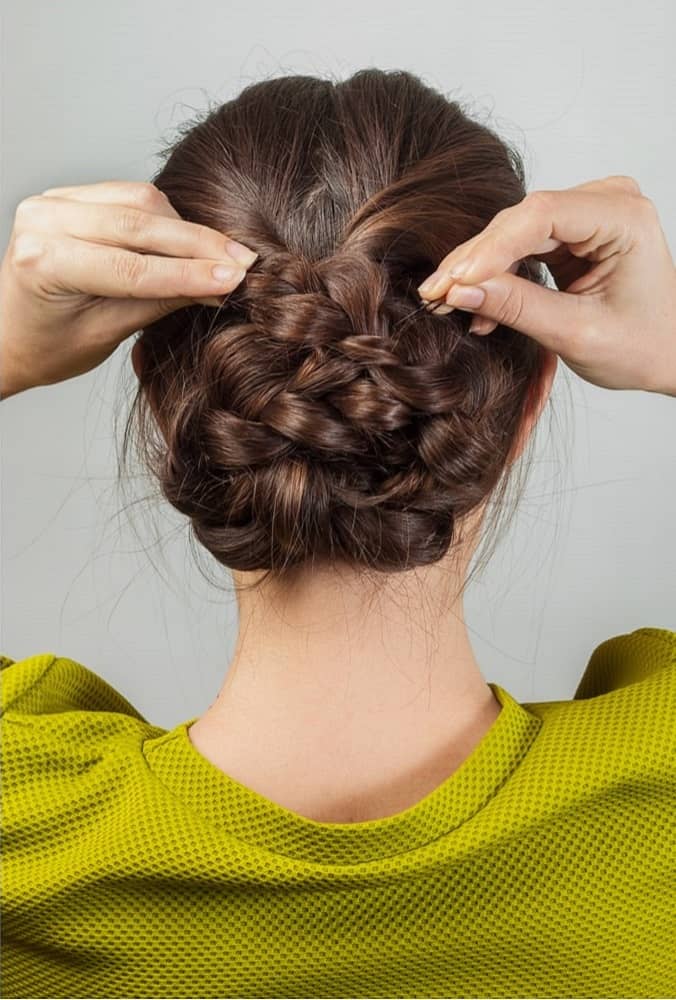
Take the braid on the left side and create the top half of the bun by using your bobby pins to pin it in a half-circle shape with the end of the braid on the opposite (right) side of the head. Once that is in place, take the braid on the right side and create the lower half of the bun by using your bobby pins to pin it in a half-circle shape with the end of the braid on the left side of the head.
When your braids are in place, secure the bun with the rest of your bobby pins and hide away the ends of your braids under other pieces of your hair. Arrange pieces as necessary to add volume to the bun and hide the hair ties. To finish the look, spray your hair liberally with your favorite aerosol hairspray.
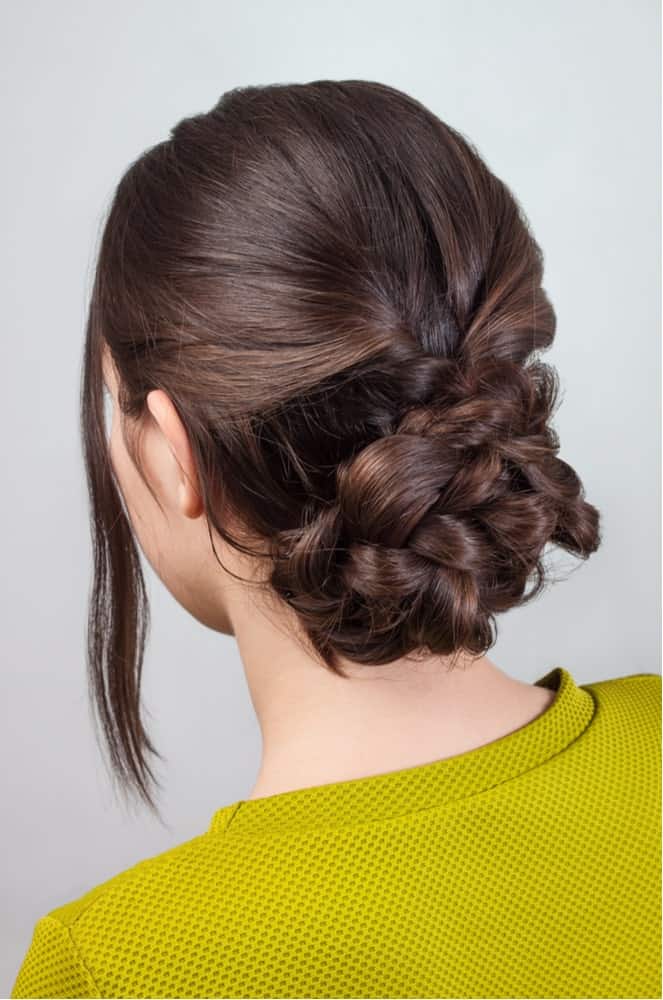
Voila! When you have finished all five steps, you are done. This hairstyle is elegant, timeless, and chic for women of all ages just as it is. It does not require any other steps to be complete. However, there are additional steps you can take to amp up your look if you wish! If you want to customize this hairstyle towards your personal style, try one of the steps below.
Follow these steps if you want your hairstyle to be:
More relaxed
To achieve a more relaxed, boho look, carefully use a rat tail comb to loosen pieces of hair around your face from the braids. This takes the look from polished to sexy and carefree. You may choose to use an iron to create waves or curls in these pieces. Be extra cautious when curling the hair around your face. You don’t want to burn yourself on your big day!
More Glam
If you want to make this hairstyle more glamorous, add faux-diamond or pearl hairpins. Maybe you’re in the mood for a flower instead. In any case, an optimal location to place an eye-catching hair accessory is just above the braided bun! Competing in a pageant? This hairstyle also works great with a tiara or crown.
More Fun
This hairstyle becomes more magical and fun with glitter hairspray! You can choose any color you prefer. Hold the aerosol can about eight inches from the head and spray as much glitter as you want. There’s no such thing as too much sparkle.
Expert tips: Do this step before you get dressed or put on your makeup unless you intend to spray glitter all over your face and outfit as well. It’s also a good idea to do this step outside to avoid spraying glitter all over your surroundings.
There are plenty of other ways to customize this hairstyle. For example, you can braid in ribbons or tinsel for a festive look. Don’t be shy. Let your style shine! You can follow these basic steps and be endlessly creative with your own ideas to add a personal touch. At the end of the day, this simple style becomes what you choose to make of it.
Be prepared for all the “great hair” compliments!