Sometimes it’s difficult to find unique hairstyles to long hair. You want something simple to dress your hair up a bit, but you also don’t want it to take a long time. This hairstyle has a unique Boho style flair to it while allowing most of the hair to still cascade down your back. It’s sure to keep your hair out of your face in a unique and fun way!
Things that you will need
Long hair (at least a few inches below your shoulders, preferably lower)
Brush or comb
Hair elastics
Hair serum (optional)
Hairspray (optional)
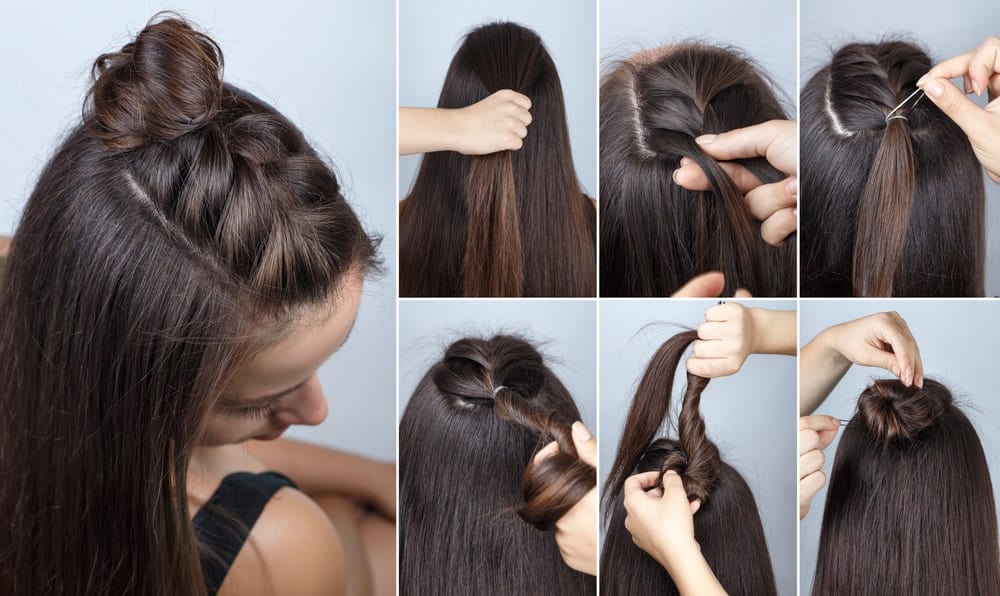
This hairstyle can be created in 6 steps:
Step 1: Gather Hair

Make sure that you brush or comb out all the tangles out of your hair. You may even want to add a smoothing serum to take care of any flyaways before you start in order to create a nice smooth finish for the resulting braid of this Boho Braid Tutorial. Make sure that it is smooth, straight, and tangle-free before you start. There’s nothing worse than encountering a tangle when you are trying to braid your hair!
Take a handful of hair of about a fist-width from the middle third of your hair and towards the front of the scalp. Make sure to take enough hair in order to be able to section it off into three good-sized strands that are about 3 finger-widths in volume. (The widths of your strands may vary depending on the thickness of the hair, the width of your fingers, other variables, etc.)
Step 2: Braid
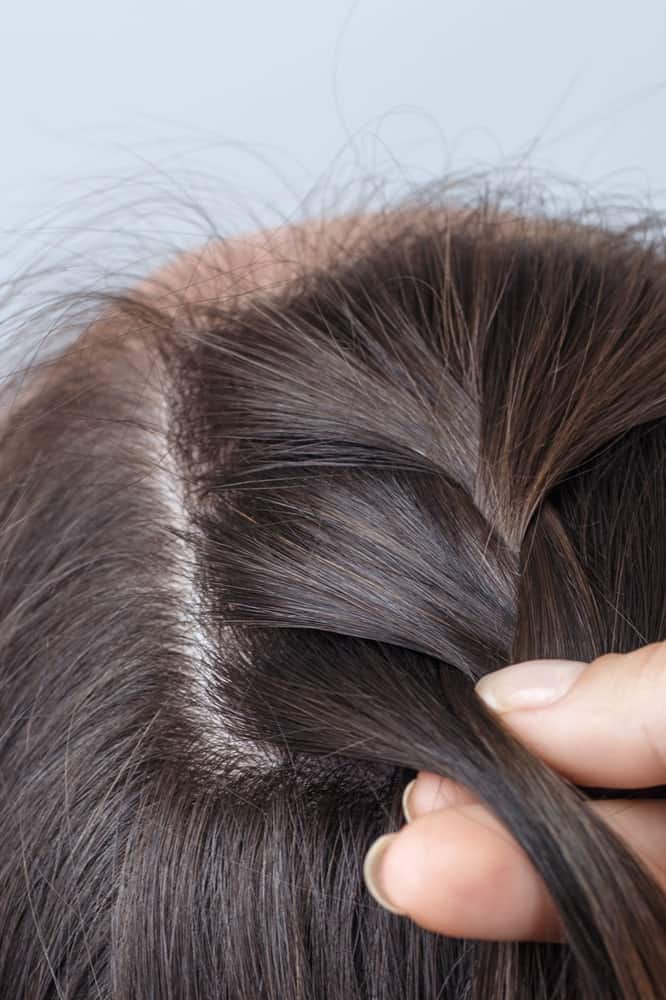
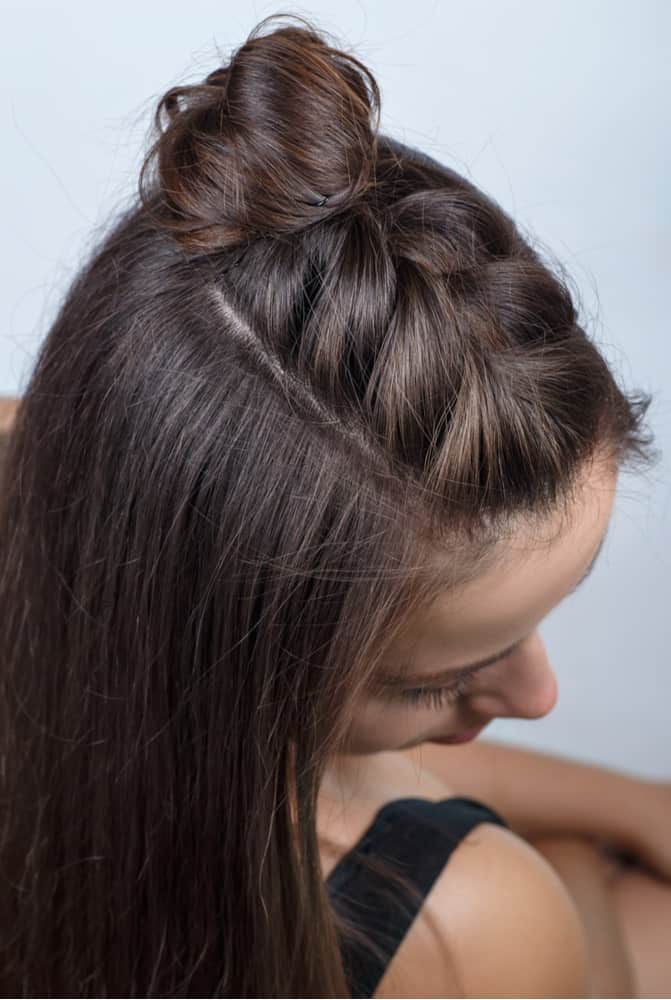
Divide the hair into three strands, and begin a normal french braiding sequence (taking each strand and putting it over the one in the middle as you work, and gathering up hair from each side little by little as you work down the top of the head) until you get to the back part of the top of the head where the scalp slopes down. This is behind the crown, and where your bun will be. Keep the strands relatively tight to keep them all together. The rest of the hair will hang down in a tail. This will be your “working” strand.
Step 3: Tie
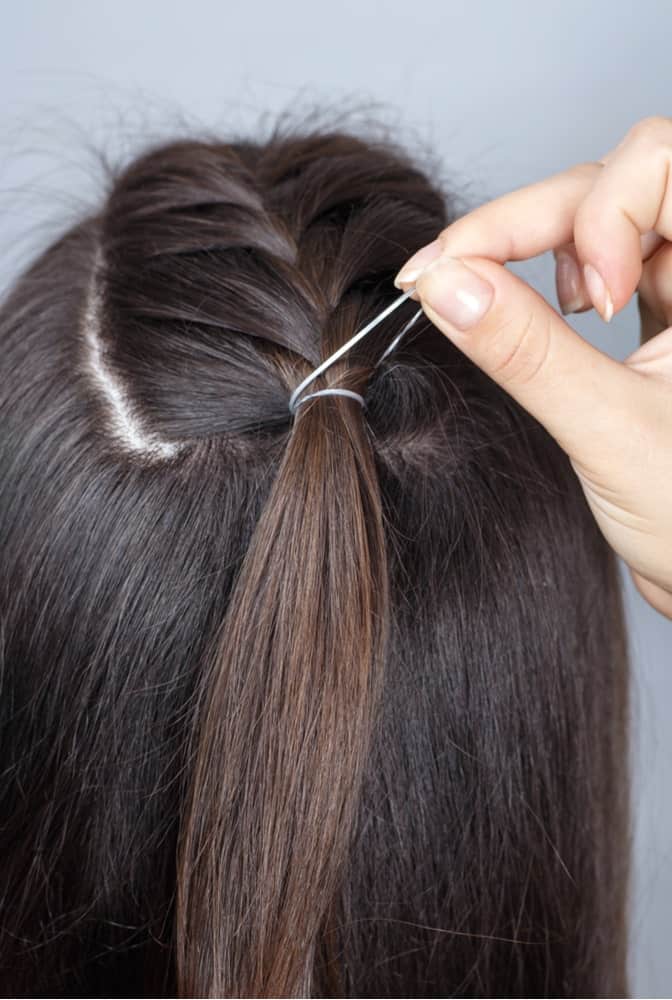
Wrap an elastic around the hair in order to make a small ponytail in the back of the hair. Be careful not to wrap it too tightly, as that could damage the hair and make it buckle, but not too loosely, as that might not hold the braid in place. The normal amount of wrapping is about twice, depending on how big or small your elastic is.
The best elastics to use are the ones that are made of some sort of cloth so that they don’t break your hair. Some of the elastics are made of flexible plastic that has a tendency to break your hair – especially if the strands are dry or otherwise damaged.
Step 4: Twist
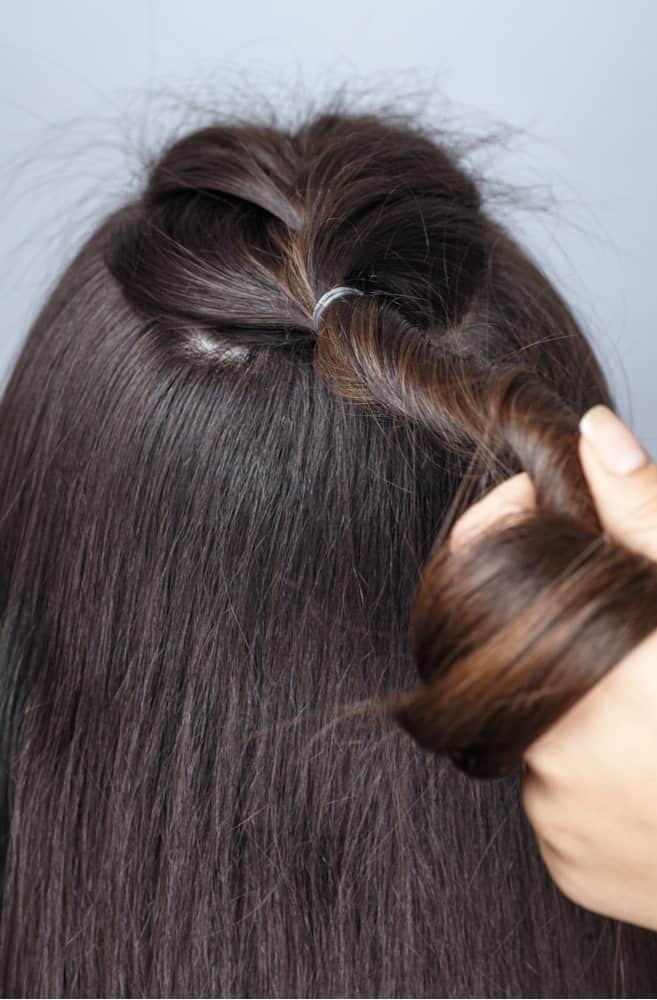
With the tail of the hair in your hand, twist it so that the hair almost begins to curl in on itself. Make sure to leave a tail of hair of about half the length of the twisted hair untwisted. This will add a bit of dimension to the resulting bun, and also give you hair to tuck. Don’t twist too hard, or the hair might break.
Step 5: Wrap
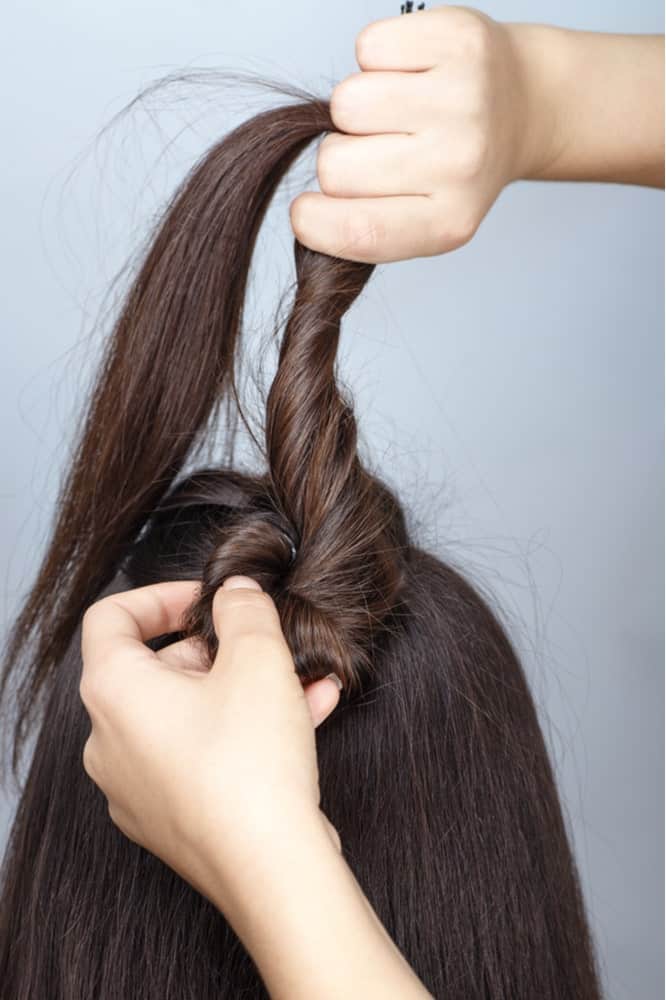
With both hands working together, anchor the base of the original ponytail with your left hand, while wrapping the twisted hair around the base of the ponytail where the elastic is. You can also switch hands if you are left hand. This will create a sort of looped donut type of bun.
Make sure that you wrap all of the twisted hair around the base in order to create a bun. Tuck the loose, non-twisted hair underneath the twisted hair making a kind of french-twist. Make it tight so that the bun will stay when you decide to go on to the next step.
If this was done with all of your hair instead of the tail that you have from the hair at the top of your head, then you would twist all of the hair until it wrapped around the base of your elastic. This way, the base of the bun would be secure. The same method, in a lesser degree, is used here.
Step 6: Pin
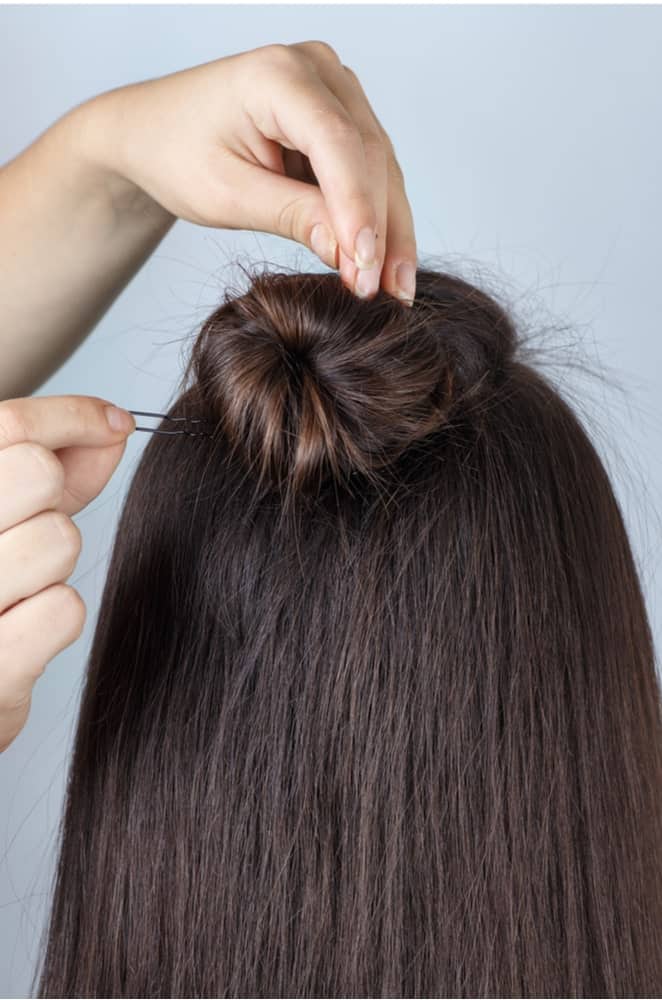
Using pins, pin the twisted bun in place to finish creating your new style! Make sure that you pin the bun in such a way that it stays without having to rely on the elastic too much. Depending on the weight of your hair, you may need more or fewer pins.
Make sure that you push the pins through the bun gently enough so that you don’t accidentally stab your scalp. If you do stab your scalp, then take the pin out and reposition it. The ones that are best to use are the coated ones with the rubber ends. They will prevent breakage and also that stabbing sensation when you are just quite too rough with pinning the bun near your scalp!
You should be able to move around without feeling like the bun is slipping or falling out. That being said, there is something very Boho and stylish about a slightly messy bun. You can also finish by using hairspray to set the hairstyle if you don’t think that the bun can be held by just the pins themselves. This usually happens if your hair is very thick, or if your bun wasn’t wound tight enough.
When the bun is completed, it will look a bit like a half bun with the french braid before it at the top of the head. The bun will be the “tail” of the french braid.
You can even dress this up a bit by adding ribbon, flowers, or anything else that comes to mind. The sky’s the limit!