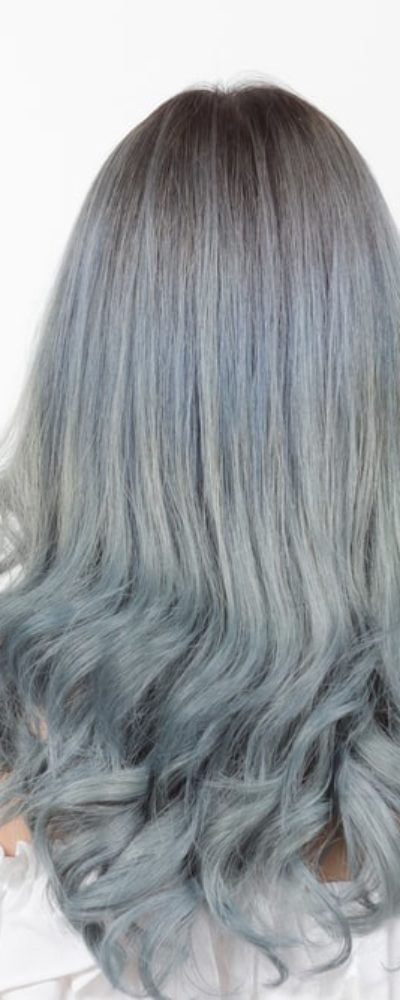
It feels SO GOOD to have your hair swept up out of your face. Maybe you’re working late on an assignment, going for a run, or just going to work. Every woman relies on a messy bun in a last-minute pinch. It’s quick, easy, and keeps your hair out of the way.
A messy bun is a lifesaver, but it isn’t always appropriate. Sometimes you need a more elegant option. Whether it be the prom or an outdoor wedding in the middle of July, a beautiful updo comes in handy to keep you cool as well as classy. With salon prices skyrocketing, not everyone can afford to dish out the cash it takes to book a professional stylist. Did you know you can create gorgeous hairstyles at home?
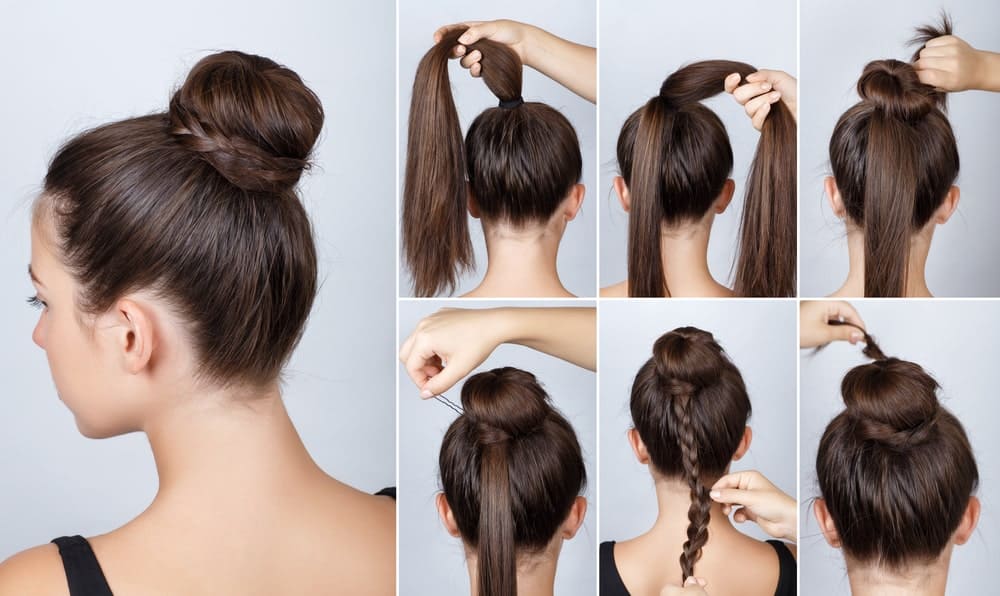
This step-by-step boho braid tutorial with photos makes a beautiful ballerina bun seem effortless. It is easy to follow! Every single step is paired with a photo and a detailed description. It doesn’t matter if you’re a beginner or an expert. Anyone can accomplish this look. Your friends won’t believe you when you tell them it didn’t take much longer than a regular, boring old bun.
Expert tip: This style has the best results with long hair. You can try it with medium length hair, but you may need extra bobby pins and hairspray.
You Will Need
- A hairbrush
- An elastic hair tie
- A small rubber hair tie
- Aerosol hairspray
- Bobby pins
Optional
- Texturizing spray
- Leave-in conditioner
- Rattail comb
- Shine spray
- Glitter hairspray
- A flower hair clip
- A ribbon
Step One: Hair Prep
Before you begin, make sure your hair is washed, conditioned, and blow-dried. If you wish, you can spray leave-in conditioner on your hair before you blow-dry it. This will keep your hair moisturized and smooth. After your hair is dry, you may choose to add texturizing spray. It is not necessary, but it can help add volume and texture to thinner hair. Brush your hair thoroughly to smooth it out and ensure there are no tangles.
Step Two: Create a High Ponytail
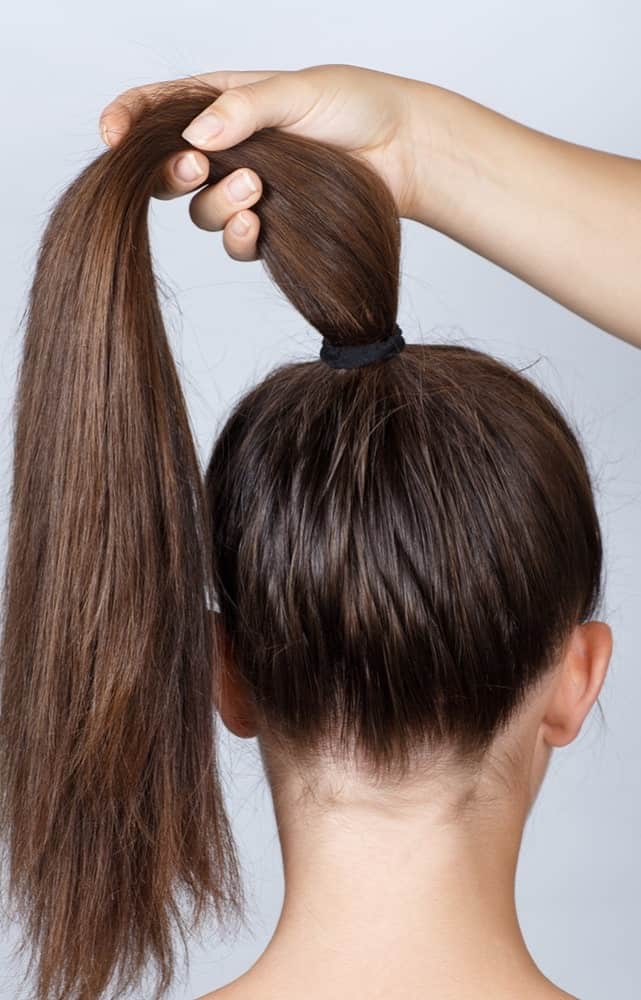
Brush your hair into a high ponytail at the crown of your head. The location of your ponytail will be the location of your ballerina bun. Using your hairbrush, smooth out your hair on all sides to rid yourself of any bumps or unevenness.
Secure the ponytail with your elastic hair tie. Hold your aerosol hairspray about eight inches from your head, and spray your hair. Don’t spray your ponytail. After you’ve sprayed your hair, use your brush to flatten any flyaway hairs to your head.
Step Three: Separate and Twist
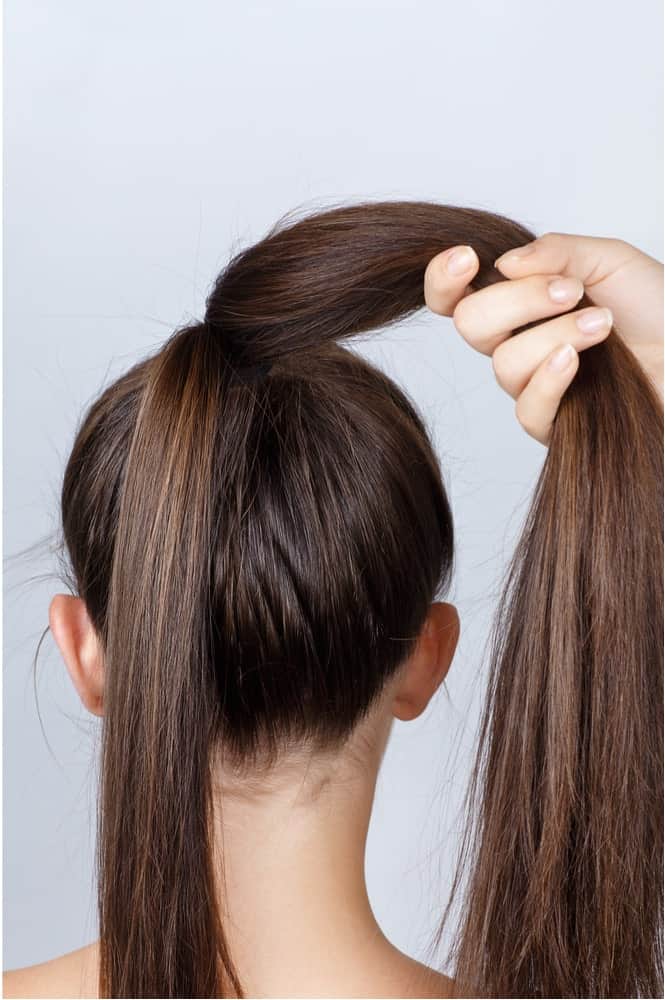
This step is very simple, but it makes take a few tries. Separate your ponytail into two sections, one larger than the other. Take the larger section and twist tightly it in your hands.
Step Four: Create the Bun
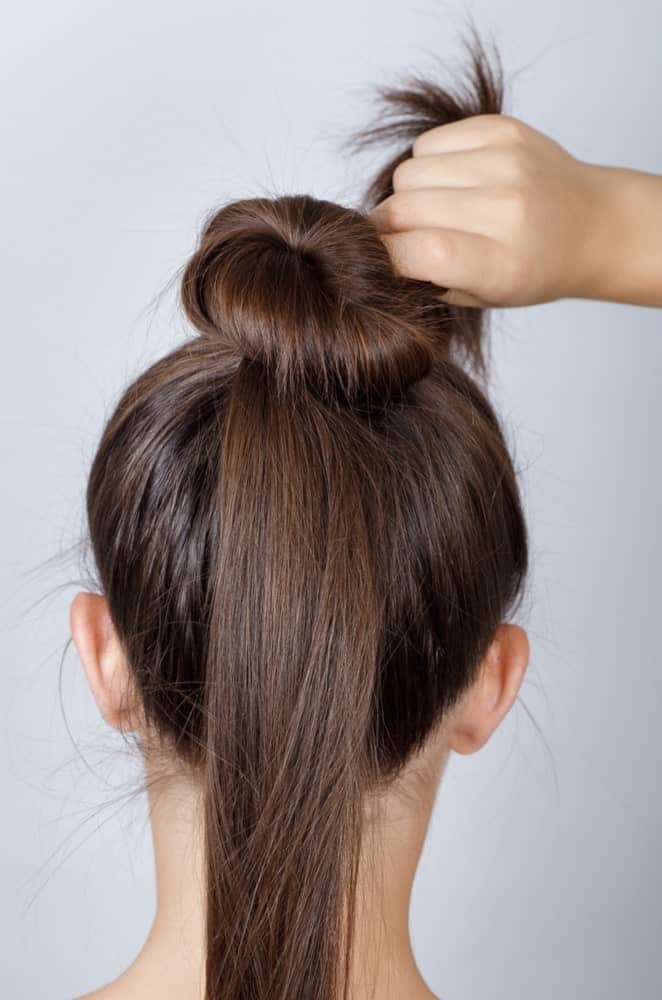
Keeping the section of hair twisted, loop the hair around in a bun on top of the head. If you are twisting the hair towards the right, you will create the bun by going counter-clockwise. If you are twisting the hair towards the left, you will create the bun by going clockwise.
Step Five: Pin the Bun in Place
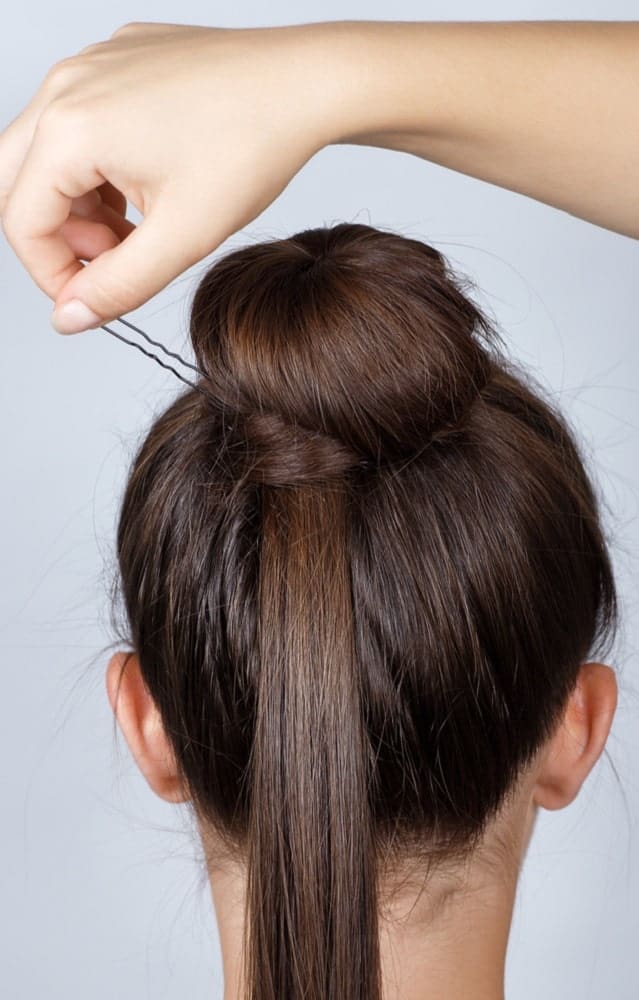
Using a bobby pin, secure the end of the twisted section of hair. Remember the zig-zag part of the bobby pin should face DOWN, not up, for a secure hold. Depending on the thickness of your hair, this may take several bobby pins around the perimeter of the bun. Use as many as you need. Hairspray the bun in place, and smooth any flyaways down.
Step Six: Create A Braid
With the remaining section of hair, create a long, traditional braid. Secure the end of the braid with a small, rubber hair tie. Once you’ve secured the braid, use your index finger and thumb to loosen each section of the plaits. Start from the top and work your way towards the bottom. This step may take some extra time.
While it doesn’t have to be completely uniform, the overall result will be better if the braid is pulled out as evenly as possible. If your hair is very silky and normally falls out of braids easily, it is a good idea to spray the braid with hairspray at this time.
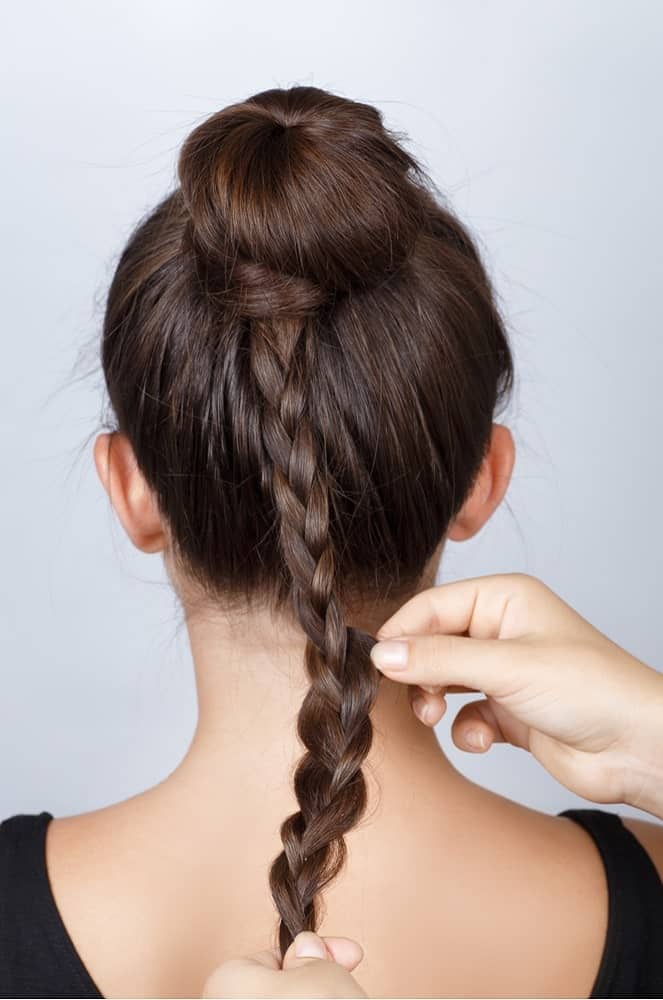
Step Seven: Wrap the Braid

Holding the hair near the rubber hair tie, wrap the braid around the perimeter of the bun. Secure it in place with a bobby pin. Using additional bobby pins, hide the end of the hair under the braid. If needed, use more pins to secure the braid around the perimeter of the bun. Once the braid is secured, set the hairstyle with a final coat of hairspray.
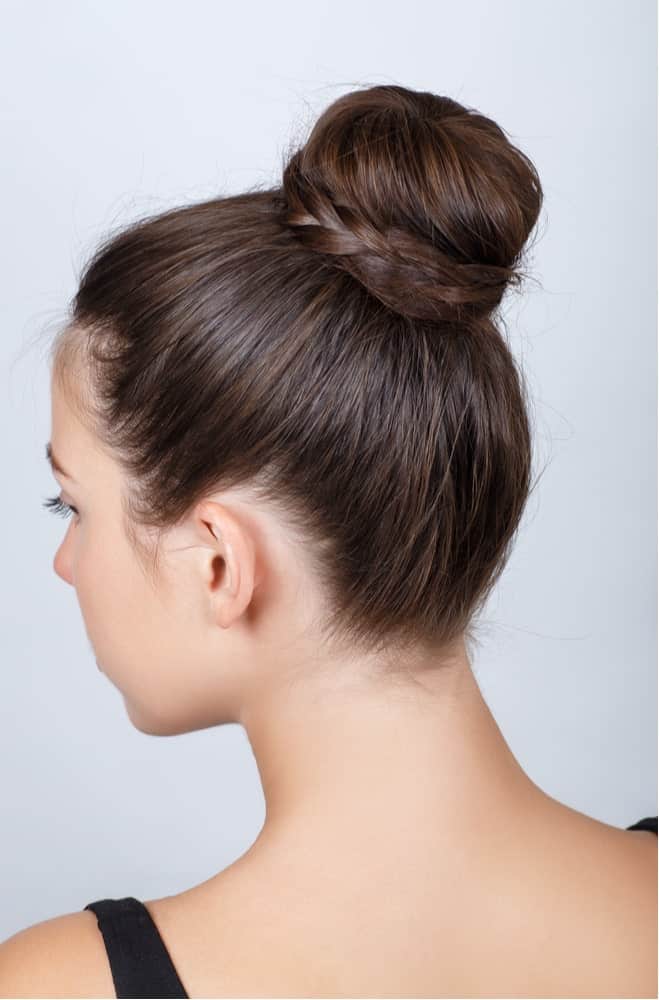
That’s it! Seven easy steps later, you have a gorgeous ballerina bun. This look is sleek and sophisticated. It doesn’t matter if you’re four, forty, or one-hundred and four! This look will be flattering on you at any age. Try it on yourself, your daughter, or a friend. Want to add a little extra flair to this style? Try one of these additional steps.
Look More Effortless
Carefully pull out strands of hair to frame your face using a rat tail comb or your fingers. Lightly curl these pieces. Be careful not to burn your face!
Add Shine
If you want to add shine to your ballerina bun, grab your favorite finishing spray and spritz! The level of shine is up to you.
Sparkle, Sparkle, Sparkle!
For extra special occasions, add glitter! Glitter hairspray comes in a rainbow of colors. Choose whichever suits you best. If you’re feeling extra glittery, add more than one color! You’re sure to look like a fairy or some other enchanted creature.
Flower Child
You don’t have to be a hippie to wear a flower in your hair. It might sound like a seventies throwback, but it’s just a cute way to add a bit of spring to your look! Adding a flower hair clip to the braid around your bun is an easy way to stand out from the crowd. It’s also an adorable way to style your flower girl’s hair!
Ribbons Upon Ribbons
A super fun option would be to braid ribbons into your hair and wrap it around your bun. You can change the colors depending on your outfit or the time of year. Alternatively, you could skip the braid altogether! Wrap a beautiful ribbon around your bun and tie it in a perfect bow. It doesn’t matter if the bow is in the front or the back. Choose whichever you like best. It’s up to you!
This simple hairstyle can stand alone or be changed a million different ways. Express your creative side. Personalize this ballerina bun for every season, holiday, and occasion. The important thing is to have fun while you gain confidence in your hairstyling abilities.